April 2005 lace
One month into it and my first real efforts - at least it looks like lace rather than a loosly woven bandage!
Click on the picture to see the full size version!
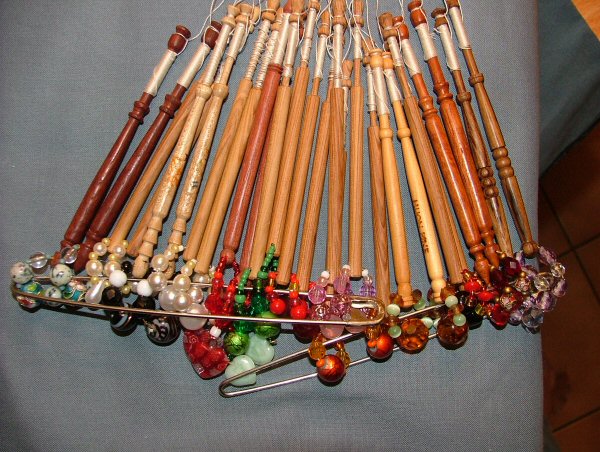
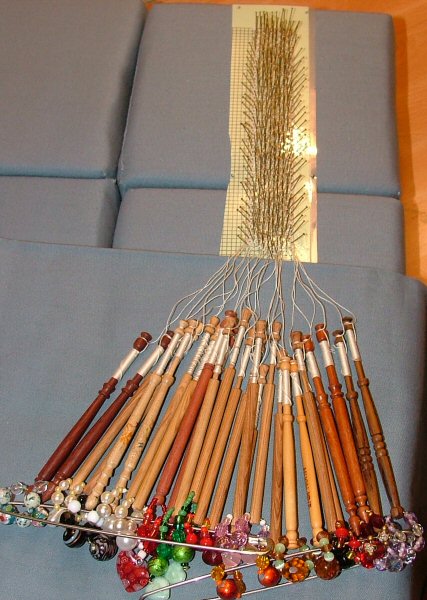
 a mixture of bobbins - some sent from the Gumlace email group, some purchased
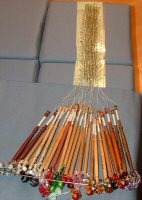
My first real effort - half stitch ground with left and right footsides are hidden under the pins
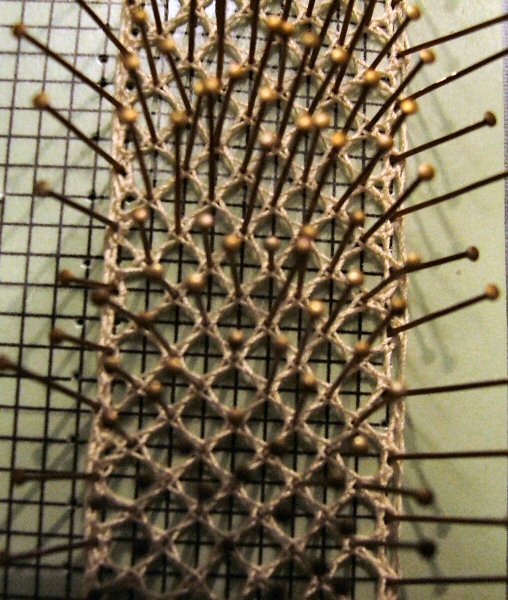
closer look while still pinned
even closer
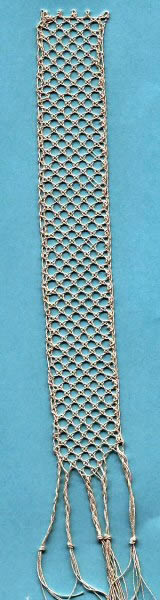
Ta-da! The finished piece - Teacher started me off, I did first few rows with tutorage and then it was finished at home.
Click on the image to see larger photo in new window!

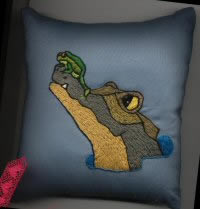
Sometimes you realise that you need something else - well, that is what happened here. I thought I needed a pin cushion so I industriously got some of the block pillow fabric, scrounged up a picture I liked (actually come from a stain glass book I bought when I tried making window clings) and even more industriously hand embroidered it. So far so good. Then I sewed it into a cushion and realised that it is a just a tad too big to be a real pin cushion. But - hey - No one ever said what size the pin cushion had to be!
9 April 2005
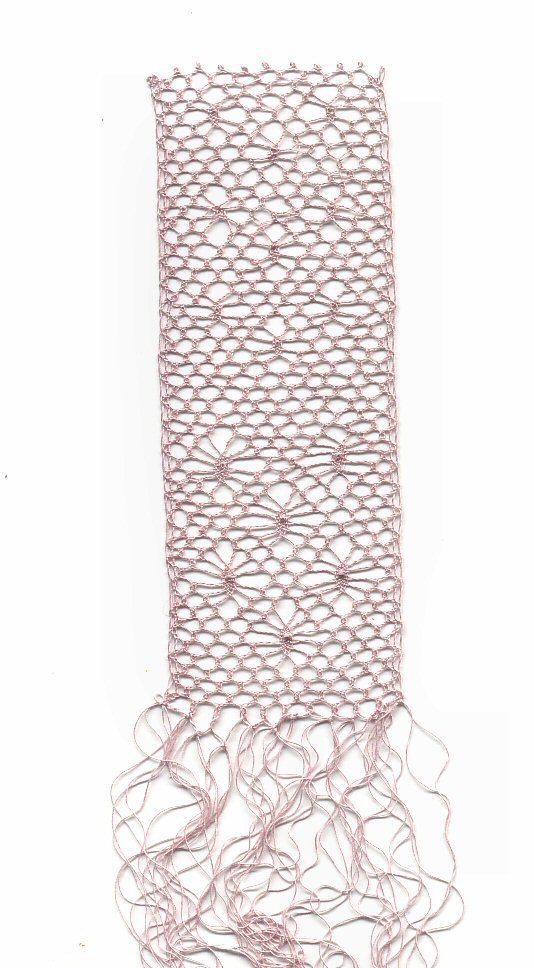
And now, the second 'real' lace. This is a whole ground with spiders. The spiders have four (4) legs at the top and six (6) legs further down. Took approx 3.5 hours so I sure won't be making miles of it any time soon.
The teacher started me off and I did the first two spiders under her tutorage but then I was on my own
10 April 2005
Starting to get the hang of this and did this one straight from the book. I could not wait for the next lesson (2 hrs a week is just not long enough)

14 April 2005
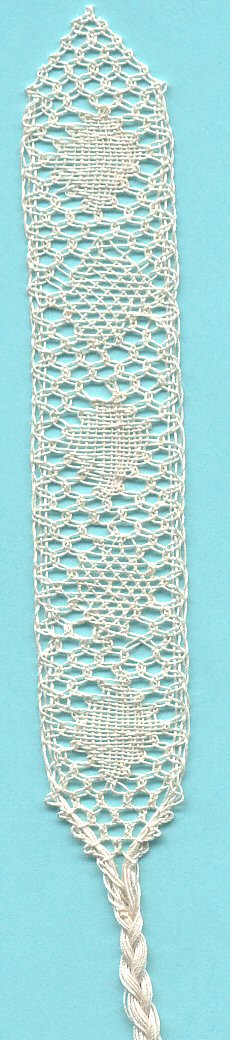
Another lesson under my belt.
This time the teacher started me off and I did the first fan under tutorage. Then when I got home it got the better of me. Finished it 3am the next morning
Gee, I wonder if I am addicted?
This time Alice showed me how to do the fan and I figured out the corner (could not wait a whole week!) and even worked out how to add a fresh bobbin in when the other was running out (twice!)
Finishing off was done on the 21st with Alice watching on
15 April 2005
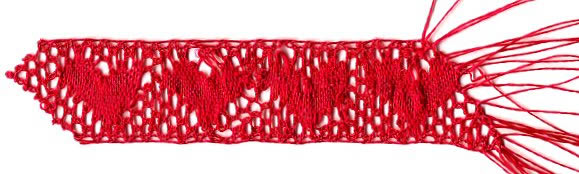
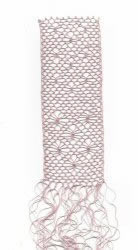
Again, I could not wait and started a new piece. This time I decided to have a go at a finer thread and printed out the pattern from Jo Edkins site http://www.theedkins.co.uk/jo/lace/hearts.htm, wound 30 bobbins with 2 metres (7 feet) of thread.
I seemed to be doing something wrong to cause the puckering effect so cut this bit off and began again. This new strip is what I am working on now (22 April) and it is about 25cm (5 inches) long so far
I particularly love the thread as it has a glorious sheen to it. 
22 April 2005
Lesson number five and I am shown how to join the lace back to the beginning of itself. Using a fine crochet hook I draw thread through the pin loop to form a loop that the pairs thread is drawn through. Then pull both threads tight and tie a knot right over left and then left over right. Weave the threads into the lace and cut the thread close to the lace !be careful here or I could cut my lace!
Finished off at home
25 April 2005
Practicing between classes has seen my tension improve and the strip of heart lace started last week now measured 50 cm (18 inches) before I ran out of thread on two of the bobbins.
It is almost the end of the second month of my learning bobbin lace and I am at last seeing my efforts starting to pay off in work that looks more like I expect lace to look.
26 April 2005
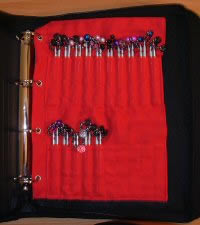
Reinventing the wheel. I decided that the roll of bobbins that kept sinking to the bottom of my bag was not on, so I thought perhaps I should carry them in another manner. I considered plastic containers - too cumbersome, bulky and too many. Then I had a brain wave (or a Jenny moment) and decided that the zippered 4 ring binder I had bought at the Post Office for $12.95 had found a home. I would make bobbin holder inserts. (see picture)
The 4 rings would add stability, the zip would prevent loose bobbins getting lost, the folder would be easy to carry and ALL my bobbins would be together (not that I have a lot you understand)
Anyway, if you like the look of them, feel free to download the instructions as a PDF file here (size 227kb)
I wonder what next month will be like? Today was the first day I have not had to go to work in over 10 years and now I have no excuse not to catch up with the housework (darn!)
|